Minimalist, space-saving and stylish, floating shelves continue to dominate interior design. Their clean appearance and hidden support system make them a favourite for both modern and traditional spaces. Whether you're planning to display books, plants, or ceramics, making floating shelves yourself can be both cost-effective and deeply satisfying. It’s a project suitable for beginners, yet customizable enough for those with advanced DIY skills.
What is a floating shelf and why is it so popular?
A floating shelf is a type of wall-mounted shelf with no visible brackets or supports. It gets its name from the illusion that it’s suspended in the air. The support system - usually metal rods or plates - is hidden inside the shelf or behind it, firmly anchored to the wall. This creates a streamlined look that blends effortlessly with most interiors.

The popularity of floating shelves stems from their versatility. They’re used in living rooms, kitchens, hallways, bathrooms, and bedrooms. They can be minimal or decorative, wide or narrow, deep or shallow. The fact that they can appear completely built-in is another bonus, especially when combined with good styling and matching finishes. For anyone learning how to build floating shelves, their appeal lies in both appearance and practicality.
What you’ll need before building a floating shelf
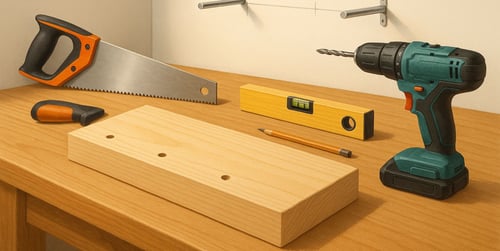
Before you start making floating shelves, it’s important to get organized. Selecting the right materials and tools ensures safety, stability and an end result that looks professional.
Essential tools and materials
To build floating shelves, you’ll need:

- Power drill with masonry, wood or multi-material bits
- Wood glue and screws (ideally 40–60 mm long)
- Tape measure and pencil for precise markings
- Spirit level or laser level
- Wall plugs or hollow wall anchors
- Saw (circular, mitre or hand saw, depending on wood type)
- Clamps, sandpaper or electric sander
- Paint or stain and brushes or cloths
- Safety goggles and dust mask
Having the right tools ready before you begin will save time and help you avoid common mistakes.
Choosing the right wood and brackets
Not all wood is equal when it comes to making floating shelves. Your choice depends on aesthetics, budget and what the shelf will support. Solid wood such as pine, oak or birch adds character and can carry more weight. For lighter loads and budget builds, MDF or plywood are popular and easy to finish.
Internal brackets make or break a floating shelf. Choose metal rods or support plates that fit tightly into the shelf body. For heavier shelves, opt for longer rods with deeper wall penetration. If your wall is plasterboard, use toggle bolts or anchors designed for cavity walls. For brick or concrete, standard wall plugs and screws will do, but always check the compatibility with your specific fixing system.
How to make a floating shelf: a step-by-step DIY guide
Once you’ve gathered your materials, the process can begin. Here’s a basic outline of how to make floating shelves that are stable, level and long-lasting:
- Measure and cut the wood to your desired size. A typical shelf might be 60–100 cm long and 20 cm deep. For better results, use a saw that ensures clean edges.
- Sand the wood on all sides until smooth. Focus on the front and top edges will be visible after installation.
- Drill holes into the back edge of the shelf to match the diameter and spacing of your metal bracket rods. These holes need to be deep and aligned precisely.
- Mark your wall using a level and pencil. Draw a straight line where the shelf will sit and use it to position your bracket mounts.
- Drill into the wall, insert the plugs or anchors, and screw the support rods or plates securely into place.
- Slide the shelf onto the supports. It should fit tightly with no movement. If needed, apply a small amount of wood glue inside the holes before sliding the shelf on.
- Finish with paint or stain, allowing for full drying time before placing any objects.
Double-check everything before loading the shelf. Poor drilling angles or incorrect bracket spacing can lead to instability, especially over time.
Creative floating shelf ideas for every room
Floating shelves are more than just functional, they’re an opportunity to shape a room’s feel. With some imagination, they can add storage, define zones or become part of the decor.
Living room styling tips
Floating shelves in living rooms can frame a fireplace, surround a TV or fill an empty wall with personal touches. Mix books, plants and decorative objects in different heights. Try balancing vertical shapes like vases with low bowls or stacked items. Always leave space between elements to avoid visual clutter.
Floating shelves in the kitchen or bathroom
In kitchens, floating shelves are perfect for storing glasses, spices or ceramics. For best results, match the wood tone to your worktop or back splash. In bathrooms, they create space for towels, bottles or small storage containers. Choose finishes that resist moisture, especially around sinks or showers.
Smart shelving for small bedrooms or hallways
In compact rooms, every bit of wall space counts. In bedrooms, install narrow floating shelves above the bed, next to wardrobes or even as bedside replacements. In hallways, a shallow shelf works well for keys, phones or artwork without blocking movement.

Finishing touches that make the difference
Even the simplest shelf can elevate a room when it’s made and placed with care. Pay attention to spacing, wall balance and how the shelf aligns with nearby furniture or features. Lighting also matters, a shelf lit from above or below becomes more than a surface; it becomes part of the room’s rhythm.
Floating shelves are a DIY project that rewards precision and creativity. They add storage, simplify lines and offer a clean backdrop for whatever you select to display. Built properly, they’ll serve not only as furniture but as a design element that lasts.
Explore more topics:
Author: Dako Furniture Team