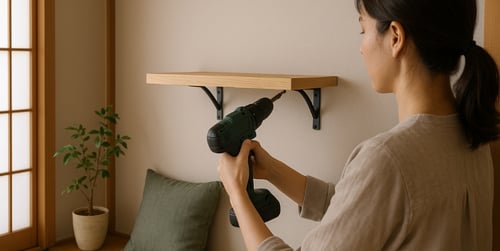
Putting up shelves may seem simple, but doing it right takes more than a drill and a spirit level. Whether you're working with plasterboard, solid brick or internal stud walls, the process demands precision and preparation. A properly installed shelf adds structure and storage, while a poorly fixed one can cause damage or worse, fall apart entirely. This guide walks through the process step by step, helping you install shelves safely and securely, no matter the wall.
How to put up a shelf: step-by-step guide for beginners
Installing shelves starts with understanding the surface you're working with and matching the right tools and fixings to the job. Each wall material reacts differently to drilling, weight and vibration. That’s why identifying the wall type is the first step before doing any measurements or making holes.
Identify your wall type – plasterboard, brick or stud?
Most walls fall into one of three categories. Each has different structural limits:
- Plasterboard is common in modern homes. It’s lightweight and needs special fixings — standard screws won’t hold securely.
- Brick or masonry walls are solid and can support heavier loads but require masonry bits and wall plugs.
- Stud walls contain wooden or metal frames behind plasterboard. You’ll need to find the studs to anchor into.
Tools and fixings you’ll need to get started
The right tools make installation easier and safer. Essentials include:
- Drill with masonry, wood or multi-material bits
- Wall plugs or anchors for your wall type
- Correct screws (length and diameter)
- Spirit level or laser level
- Tape measure and pencil
- Stud finder or small magnet
- Toggle bolts or plugs for hollow walls
- Dust sheet and safety goggles
Always use the appropriate anchors especially on plasterboard, where spreading the load is key to safety and stability.
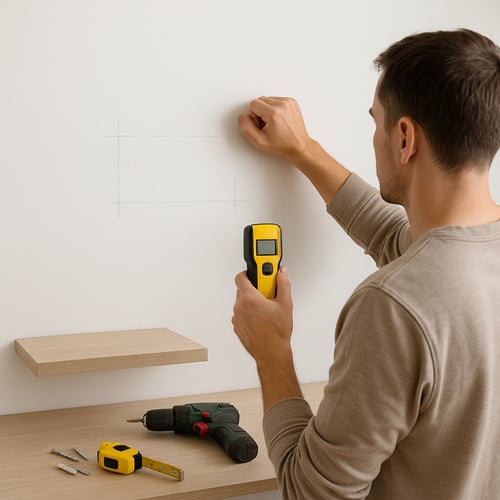
How to measure and mark the wall accurately
Good shelf installation starts with accurate marking. First, decide the shelf height and width based on what it will hold. Draw a light guideline across the wall with a pencil, using a spirit level. It ensures the line is perfectly horizontal.
If you're installing multiple shelves, mark the full layout before. This gives you a better overview and helps avoid mistakes like uneven spacing or misaligned edges. Always double-check measurements — wall studs and sockets can interfere with bracket positions.
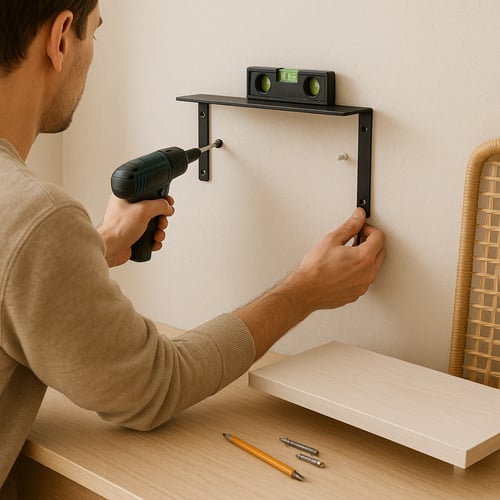
Checking shelf level and load capacity
A level shelf is not just aesthetic, it’s functional. Items can shift or fall from a sloped surface. Check the spirit level more than once during the marking and drilling stages. If using adjustable brackets, make sure they’re aligned before tightening screws.
Also consider load capacity. A floating shelf holding a few framed pictures requires different support than a bookshelf loaded with hardcovers. Manufacturers often list maximum weight limits. Never exceed these limits, especially on plasterboard or stud walls, where fixing strength is more limited.
How to put up floating shelves for a clean, modern look
Floating shelves offer a minimalist finish. Without visible brackets, they appear to hover, making them ideal for contemporary interiors. However, this sleek design means that installation must be precise — any misalignment will be obvious.
Choosing the right floating shelf and wall anchors
Not all floating shelves are created equal. Some include a concealed metal bracket that slides into the back of the shelf. Others rely on a bolt system that locks inside the wall. Either way, the anchor must match the wall type and the shelf’s weight.
Brick and concrete walls support floating shelves best. Use long wall plugs and heavy-duty screws. For plasterboard, only use hollow-wall anchors specifically designed for floating shelf installation. If possible, anchor one side into a stud for added support.
Securing a floating shelf without visible brackets
Once the position is marked, drill the fixing holes carefully. Insert wall plugs or anchors, then fix the internal bracket. Use a spirit level again. Then slide the shelf onto the bracket, ensuring it sits flush with the wall.
If there’s any movement or unevenness, adjust before loading anything. A secure fit is essential for long-term use. Some shelves also include hidden locking screws underneath and tighten these for added stability.
How to put up shelves without brackets – smart, bracket-free options
Not every shelf needs visible supports. Besides traditional floating systems, you’ll find options like keyhole mounts, concealed cleats or hidden rails. These give a cleaner look, especially in entryways or bathrooms where simplicity is preferred.
Bracket-free systems often require deeper shelves, as the support is embedded into the shelf itself. Installation usually involves attaching a wall-mounted metal bar or rod, which the shelf then slides onto. Always check alignment and level before final placement.
These designs are ideal when you want the shelf to look seamless like part of the wall rather than an added piece. Just make sure you use the correct fixings and weight limits provided by the manufacturer.
How to make sure your shelf is straight, stable and secure
After you’ve finished installing the shelf, double-check the level using a spirit level. Even slight tilts can lead to uneven weight distribution. Apply light pressure to test for movement any wobble means something needs adjusting. Screws might need tightening or wall plugs might not be set deeply enough.
Look for signs of wall damage, such as flaking plaster or widened holes. If required, reposition the fixings slightly above or below to avoid weakening the same area. When everything feels solid, load the shelf gradually and keep an eye on it in the days that follow. Sagging or shifting can signal that the weight is too much or that adjustments are still needed.
Common mistakes when putting up a shelf (and how to avoid them)
Mistakes in shelf installation are usually avoidable. Here are the most common ones and how to avoid them:
- Using the wrong wall fixings for the surface type
- Failing to check for studs, pipes or cables before drilling
- Not using a level when marking and installing brackets
- Overloading the shelf beyond its design capacity
- Rushing the process or skipping pre-drilling steps
Correct tools, proper planning and attention to wall type are the best defences. Take your time, follow the process and measure twice. A well-installed shelf doesn’t just look better, it performs better too. And with the right technique, even a beginner can get it right the first time.
Getting it right: finishing with confidence
A well-installed shelf isn’t just functional, it reflects care, attention and understanding of the space. Done properly, it blends into the room, supports daily life, and lasts for years without drawing unnecessary attention. It holds more than just objects; it holds the structure of how a space works. When each step is taken thoughtfully, even the simplest project becomes something lasting, useful and quietly satisfying.
Explore more topics:
Author: Dako Furniture Team