Laying a patio is one of the most rewarding DIY projects you can take on - and one of the most manageable with the right preparation. The result is a permanent outdoor space that adds real value to your garden and your daily life. Whether you are working with a compact courtyard or a larger garden area, this step-by-step breakdown covers everything you need to get it right from the ground up!
How to lay a patio: what the process actually involves
Learning how to lay a patio is less about specialist skill and more about careful preparation and patience. The process follows a logical sequence: planning the layout, preparing the ground, laying a base, bedding the slabs, and finishing the joints. Most domestic patios can be completed over a weekend with basic tools - the key is knowing what to expect at each stage before you begin. Garden table and chairs are worth having in mind from the outset, as the size and arrangement of your furniture should inform the dimensions of your patio before a single slab is laid.
Choosing the right patio slabs for your garden
The slabs you choose affect how your patio looks, how it performs over time, and how much work is involved in laying them. Natural stone gives a premium, characterful finish but requires more care when cutting and sealing; porcelain is dense, frost-resistant, and easy to clean; concrete offers the most accessible entry point in terms of cost. Whatever material you select, always order at least 10-15% more than your calculated requirement to account for cuts and any breakages during the project.
What you need before laying a patio (tools, materials & planning)
Getting the right materials and tools together before starting saves significant time and prevents the frustration of stopping mid-project. Patio construction is straightforward when everything is to hand; it becomes unnecessarily difficult when you are making multiple trips to the supplier mid-job.

Essential tools for laying patio slabs:
- Spade and wheelbarrow - for excavating and moving material
- Spirit level and string line - for maintaining an accurate fall and alignment
- Rubber mallet - for bedding slabs without cracking them
- Bolster chisel and angle grinder - for cutting slabs to fit edges and corners
- Plate compactor or hand tamper - for compacting the sub-base
Materials needed for a standard cement-bedded patio:
- Type 1 MOT sub-base - compacted hardcore layer that provides a stable foundation
- Sharp sand and cement - mixed at a ratio of approximately 4:1 for the bedding mortar
- Patio slabs - allow 10-15% extra for cuts and wastage
- Jointing compound or mortar - for filling the gaps between slabs once laid
Planning your patio layout before you start
Sketch the patio to scale before ordering materials. Measure the area carefully, account for a slight drainage fall of around 1:60 away from the house, and work out how many slabs you need based on their dimensions. Ordering slightly more than the calculated quantity accounts for cuts and any breakages - running out of slabs halfway through is one of the most avoidable delays in any patio project.
Preparing the ground: the most important step in patio construction
Ground preparation is where most DIY patios succeed or fail. A patio laid on poorly prepared ground will settle unevenly, hold water, and develop cracks as the sub-base shifts beneath it. Getting the excavation depth right and compacting the sub-base thoroughly are the two things that matter most at this stage - everything else is recoverable, but a poor foundation is not.
Excavate to a depth of around 150-200 mm below the finished patio level. Remove all topsoil, roots, and organic material - organic matter continues to decompose after the patio is laid, causing uneven settlement. Lay and compact the Type 1 sub-base in layers of no more than 100 mm, checking that the surface is firm before proceeding.
Checking and managing drainage
A patio must shed water away from your house. Mark a string line across the patio at the correct fall before laying begins, and check it regularly as the work progresses. A fall of 1:60 is the standard minimum - for every 60 cm of patio width, the surface should drop by 1 cm.
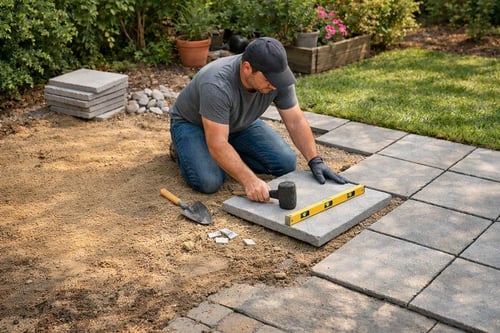
How to lay patio slabs properly (the standard method explained)
The standard method for laying patio slabs uses a mortar bed of sharp sand and cement. Mix at a ratio of 4 parts sharp sand to 1 part cement, and lay the mortar approximately 40-50 mm deep. Place each slab carefully, pressing down firmly and tapping with a rubber mallet to achieve full contact. Check the level and fall after each slab, and adjust before the mortar stiffens.
Step-by-step sequence for laying paving slabs:
- Set out the string lines - establish the finished level and fall before any mortar is mixed
- Mix the bedding mortar - 4:1 sharp sand to cement, mixed to a firm, workable consistency
- Lay the mortar bed - spread to a depth of 40-50mm, slightly larger than the slab
- Place the slab - lower carefully, press firmly, and tap with a rubber mallet
- Check level and fall - use a spirit level after each slab and adjust before the mortar stiffens
- Maintain consistent joint gaps - use spacers to keep gaps even before pointing
Do not walk on your newly laid slabs for at least 24 hours - the mortar needs time to cure before it can take any load without shifting.
How long does it take to lay a patio?
The time required to lay a patio depends on its size, the complexity of the layout, and your experience level. A straightforward 20-30 square metre patio with a simple rectangular layout can realistically be completed over two days - one day for excavation and sub-base preparation, and one day for laying the slabs. Cutting, pointing, and any finishing work typically adds another half day on top of that.
More complex layouts involving curved edges, different slab sizes, or awkward cuts will take longer - and it is always worth building extra time into your plan rather than rushing the later stages when fatigue sets in. The stages you are most tempted to hurry - ground preparation and mortar curing - are precisely the ones where patience pays off the most. A realistic timeline prevents the shortcuts that cause problems later.
Can you lay slabs on sand? Pros, cons and when it works
Most beginners ask this early on - and the short answer is yes, but with conditions. Asking can you lay slabs on sand is reasonable because laying paving slabs on a compacted sand bed is a legitimate method for smaller patios and pathways where the slabs may need to be lifted and relaid in future. The main advantage is simplicity - no cement mixing and no curing time. The main disadvantage is stability: a sand-bedded patio will develop uneven surfaces more quickly than a mortar-bedded equivalent, and weeds are more likely to establish in sand joints over time.

How to lay paving slabs on soil (and when it's a good idea)
Laying paving slabs on soil directly is only appropriate for informal garden paths where occasional unevenness is acceptable. For a patio intended for your furniture or frequent use, laying paving slabs on soil without a proper sub-base is not recommended - the soil will settle unevenly and cause slabs to rock and shift within a short period.
If you are set on a low-intervention approach for a lightly used area, removing the top layer of turf, levelling the surface, and adding a thin layer of sharp sand gives a more stable result than placing slabs directly on bare earth. Even so, treat this as a temporary solution rather than a permanent patio construction method.
How to lay a patio without cement: DIY-friendly alternatives
A manageable DIY project without the complexity of mortar work is exactly what most beginners are looking for, and understanding how to lay a patio without cement opens up several alternatives, each suited to different situations.
DIY-friendly alternatives to a cement-bedded patio:
- Compacted sand bed - simple to install and easy to lift and relay, but less stable over time
- Dry-mix mortar - sharp sand and cement mixed dry; ground moisture activates it gradually
- Rubber or composite paving - interlocking systems that lay directly onto a prepared surface
- Gravel or crushed stone base - suits informal areas and permeable paving; not suitable for heavy use
Laying a DIY patio: common mistakes to avoid
A DIY patio is well within reach for most beginners, but a handful of consistent mistakes account for the majority of problems.
The most common DIY patio mistakes:
- Insufficient excavation depth - not digging deep enough leaves the sub-base too shallow to provide adequate support
- Skipping the sub-base - laying slabs directly onto soil almost always leads to uneven settlement
- Incorrect fall - a level patio causes pooling; always build in a drainage fall away from the house
- Rushing the mortar cure - walking on freshly laid slabs causes movement that is difficult to correct
- Inconsistent joint gaps - uneven gaps are difficult to point neatly and make the finished patio look amateurish
How to get a level finish when laying paving slabs
Achieving a consistent level across your patio requires checking frequently rather than assuming the mortar bed is behaving as expected. Use a long spirit level or straight edge spanning several slabs to identify any high or low points early, and adjust while the mortar is still workable. Once the mortar begins to stiffen, corrections become significantly harder and risk disturbing adjacent slabs. Working methodically across the patio in rows, rather than filling in gaps randomly, makes it far easier to maintain a consistent level throughout.
Finishing touches: jointing, sealing and patio maintenance
Once your slabs are laid and the mortar has cured, fill the joints by brushing dry jointing compound into the gaps and activating with a light water spray, or apply wet mortar with a pointing trowel for a more durable finish. A well-laid patio needs only occasional cleaning and repointing to stay in good condition for years - and once it is complete, our corner garden furniture sets are designed for exactly this kind of generous outdoor space, giving your patio a clear and inviting purpose from day one.
Explore more topics:
Author: Dako Furniture Team